Well hey there, winter! I’m looking forward to you (and a sneaky winter weekend in Margs coming up soon!) This is always a quieter period of work for me, which is nice before spring as that’s always the busiest season anyway. Now, it’s June and that means it’s time for another guest blog post!
If you missed last month, read up on simple ways to spark joy in motherhood right here.
This month is a doozy, and will be so helpful for soooo many mamas too. Melissa from DigiScrapHQ is here to give us some easy tips for enjoying your photos more. Mel is a homeschool Mum of 4, tech expert, youtuber and teaches people how to organise and use their photos better. You can follow her on youtube, Facebook and Instagram.
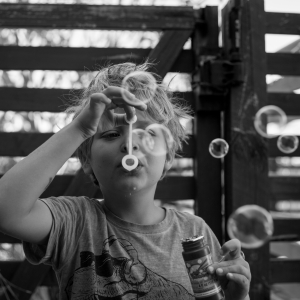
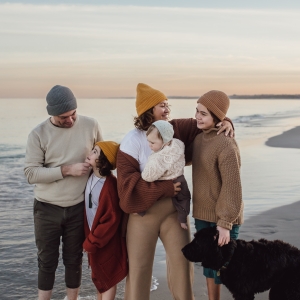
Mel needed some new branding imagery so you’ll see some gorgeous work from us throughout the blog. I hope you try out a few of her tips for enjoying your photos more!

Help! What can I do with all these photos?
If you are reading this post, I’m almost certain you have a few thousand photos on your phone. Instead of feeling overwhelmed by all the captured moments, why not try one of these easy ways to make those photos more visible in your life.
Let’s start off with one you might already be doing…
1. Enjoy more photos with a lock screen gallery
We all pick up our phones a hundred times a day, so why not enjoy your favourite photos when you are confirming your next doctor’s appointment via sms.
Watch a video on how here.
Here’s how to make your iPhone a portable gallery!
1. Wake your iPhone and unlock it.
2. Press and hold on the Lock Screen until the wallpaper gallery appears.
3. Tap the blue + button in the bottom-right corner of the screen.
4. Select Photo Shuffle from the wallpaper menu.
5. Tap some photos in your photo library to include in the shuffle, then tap Add. I like to just browse my favourites.
6. Tap the ellipsis button (the three encircled dots) in the bottom-right corner of the screen.
7. Tap Shuffle Frequency, then choose from Daily, Hourly, On Wake, and On Tap.
8. Tap Done in the top-right corner to finish, then tap your new Photo Shuffle wallpaper to select it from the gallery.
Your new shuffle wallpaper will now be live. Tap or wake your iPhone’s screen to change the photo, or wait for it to change automatically, depending on your chosen option.
Got an Android?
There’s lots of different options depending on your phone, but here’s a quick way that will hopefully work on your phone!
Go to Settings > Display > Wallpaper > Gallery. From there you can choose 15 pictures you want to include in the slideshow and set the duration for each slide.

2. Create a face book for your baby
This is one tool I used when I lived far from family to help my babies and toddlers to connect names to faces in our family. I love this one because it’s so simple and very cheap!
Watch how here.
1. Grab a $2 soft cover photo album from Kmart.
2. Choose photos of your friends and family (be sure to include a photo of your child too!)
3. Order free prints from the Snapfish App. You get 50 prints free each month, just pay for postage.
4. Slip the photos into the photo album.
5. Your little one can enjoy seeing photos of people they love (without screentime!)
My children have kept these for years and added other photos to their own little album.

3. Create a photo collage of a special day with the Project Life app
For something with a little more creativity, why not check out the Project Life app? It combines your photos with designer kits that have journalling cards (for writing captions or the story of the day) and filler cards.
I love to create collages of our travels and special events and it’s so easy to do with the Project Life App. You can pick it up for free here for iOS and here for Android.
1. Choose a few favourite photos.
2. Add them to a collage page in the Project Life App.
3. Decorate with themed cards.
4. Tell a story with a journalling card.
5. Print at home or online.
See my how-to video here.

4. Start an album with digital scrapbooking
If you are keen to customise your pages and have some no-mess creativity in your life, you could also try your hand at digital scrapbooking. The basic process is similar to the Project Life app but with more creativity!
1. Choose a few favourite photos.
2. Decorate with digital scrapbooking supplies.
3. Tell a story with journalling.
4. Print at home or online.
Here’s how I made my page on Youtube. If you are keen to give it a go, you can download Photoshop Elements here (free 30-day trial) and use the supplies I used thanks to Pink Reptile Designs. Once I’ve made about twenty pages, I’ll print out the whole book, and it turns out something like this.


Learn More with DigiScrapHQ
If you are interested in doing more with your photos, my site Digital Scrapbooking HQ is home to classes that help you do just that. Take my Digital Scrapbooking for Absolute Beginners class and I’ll guide you through making your first digital scrapbook page, and so much more.
I hope you are feeling inspired to make your gorgeous photos more visible in your life.


Thanks so much Mel! So many good ideas there. And you can read my blog on general photo printing here.
Here’s a few more of my personal faves from our little branding sesh we did.
(But, Cat, you’re always banging on about how you only do families!)
(omg, I know, shush, love my friends and their gorgeous faces!)


Look forward to capturing your family story soon xxx
– If you see partially loaded images, try clearing your internet cache in your settings by clicking “clear cache” and coming back. Thank you! –
Sign up to my mailing list to receive occasional emails about seasonal specials, including when minis are coming up, and receive 2 free images with your next session!